Access and First Setup
1. Sign in through central auth
Open the central CaveTech login at https://auth.centralcave.com or your environment-specific auth domain. After login, you should see EventSale System in the product list with Workspace ready.
What to confirm on this screen:
- your CaveTech account is active
- EventSale appears in the product list
- the card shows an attached workspace
2. Open the EventSale dashboard
Use the Access EventSale button from the central panel. You will land on /dashboard.
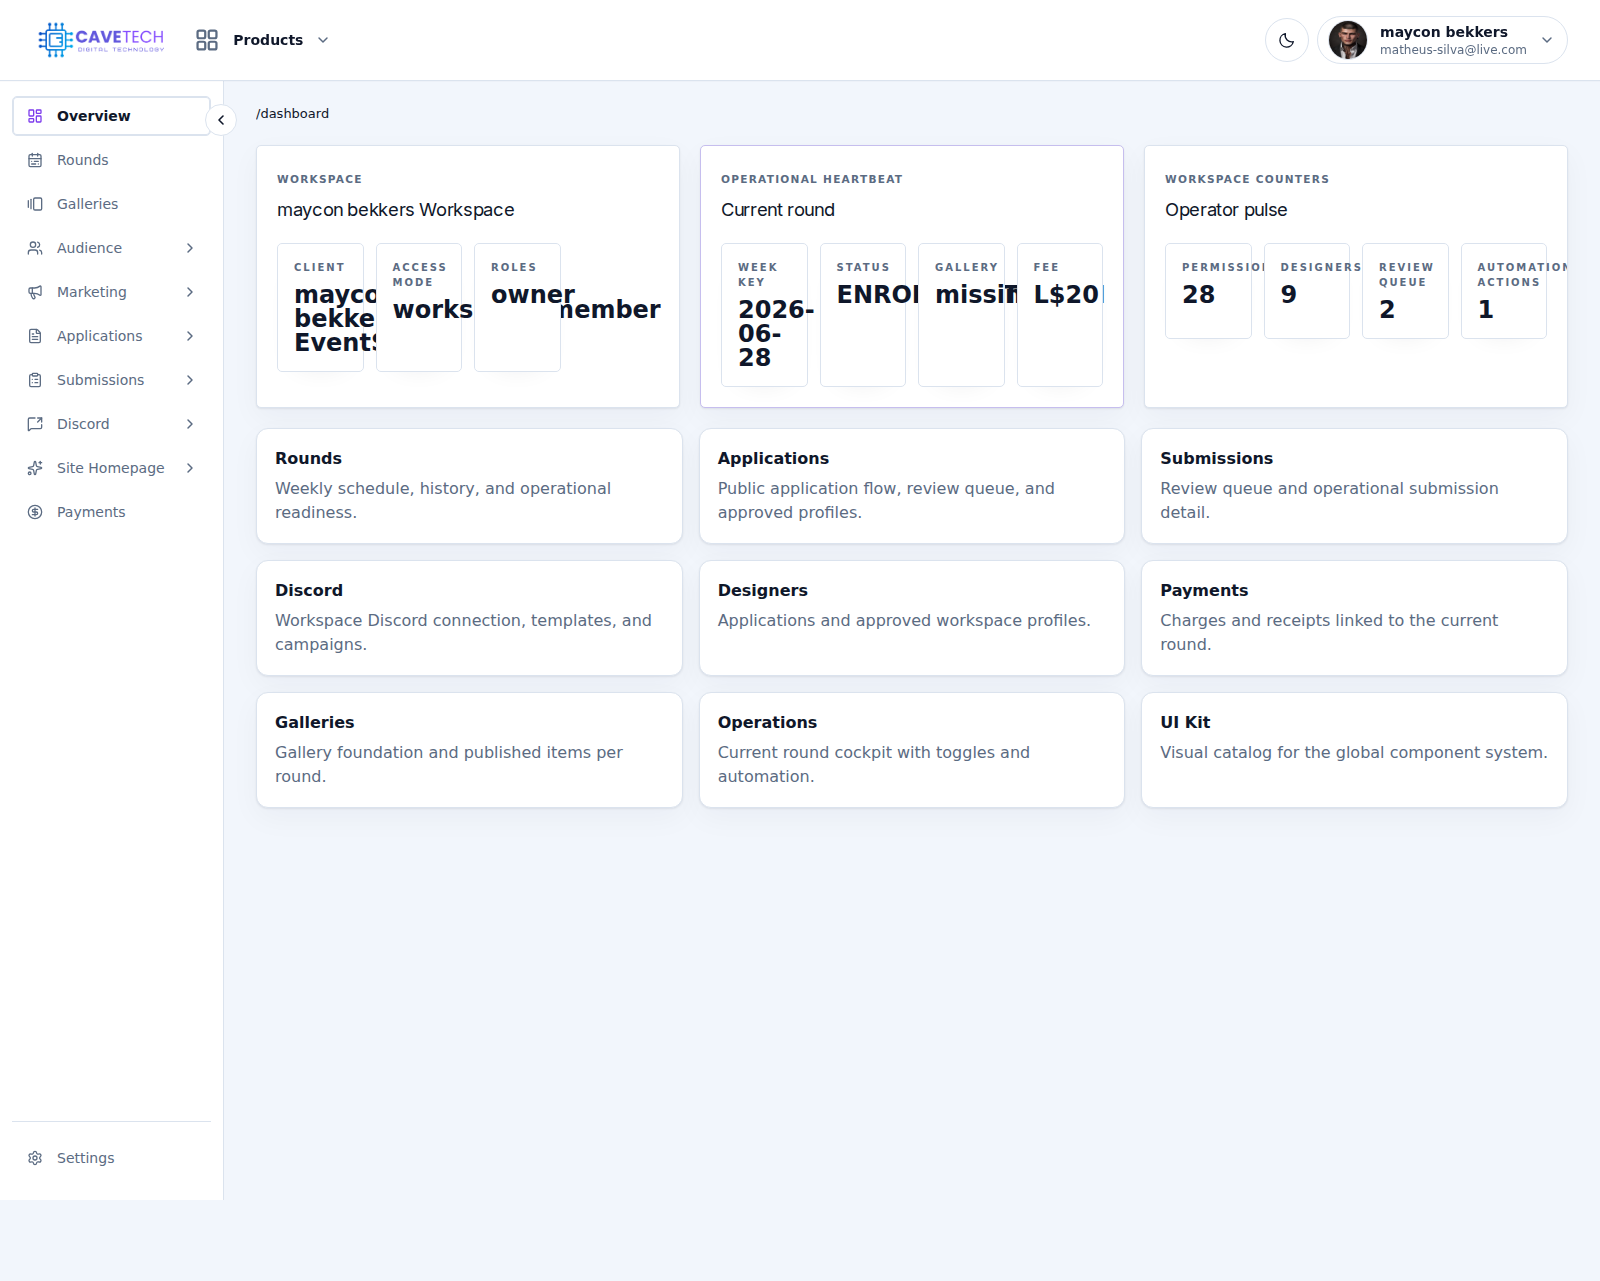
On the first screen, confirm:
- Workspace: the tenant name is correct
- Access mode: usually
workspace_member - Roles: owner, manager, reviewer, finance, or readonly roles
- Current round: week key, round status, gallery status, and fee
3. Set the product in the correct order
For a new tenant, configure EventSale in this order:
- Settings
- brand name
- support email
- accent color
- public portal toggles
- payment land link
- default weekly fee
- creator verification requirement
- Rounds / Operations
- confirm the current round exists
- confirm enrollment and payment windows
- confirm automation defaults
- Applications
- review the public application layout
- keep the locked system fields in place
- Site Homepage
- publish the public tenant homepage
- Discord
- connect the shared bot and routing
- Team
- invite internal workspace staff
4. Understand the in-world dependencies
EventSale has two important in-world objects:
- Verification object
- sends avatar verification codes for creator onboarding
- sends manager onboarding links when creator assistants are invited
- Payment terminal
- receives round payments
- attaches payment state to the creator or delegated manager flow
If the tenant wants a full production workflow, both objects must be enrolled and healthy.
5. Review core settings first
The Settings page controls what the buyer will see publicly and how the tenant runs operationally.
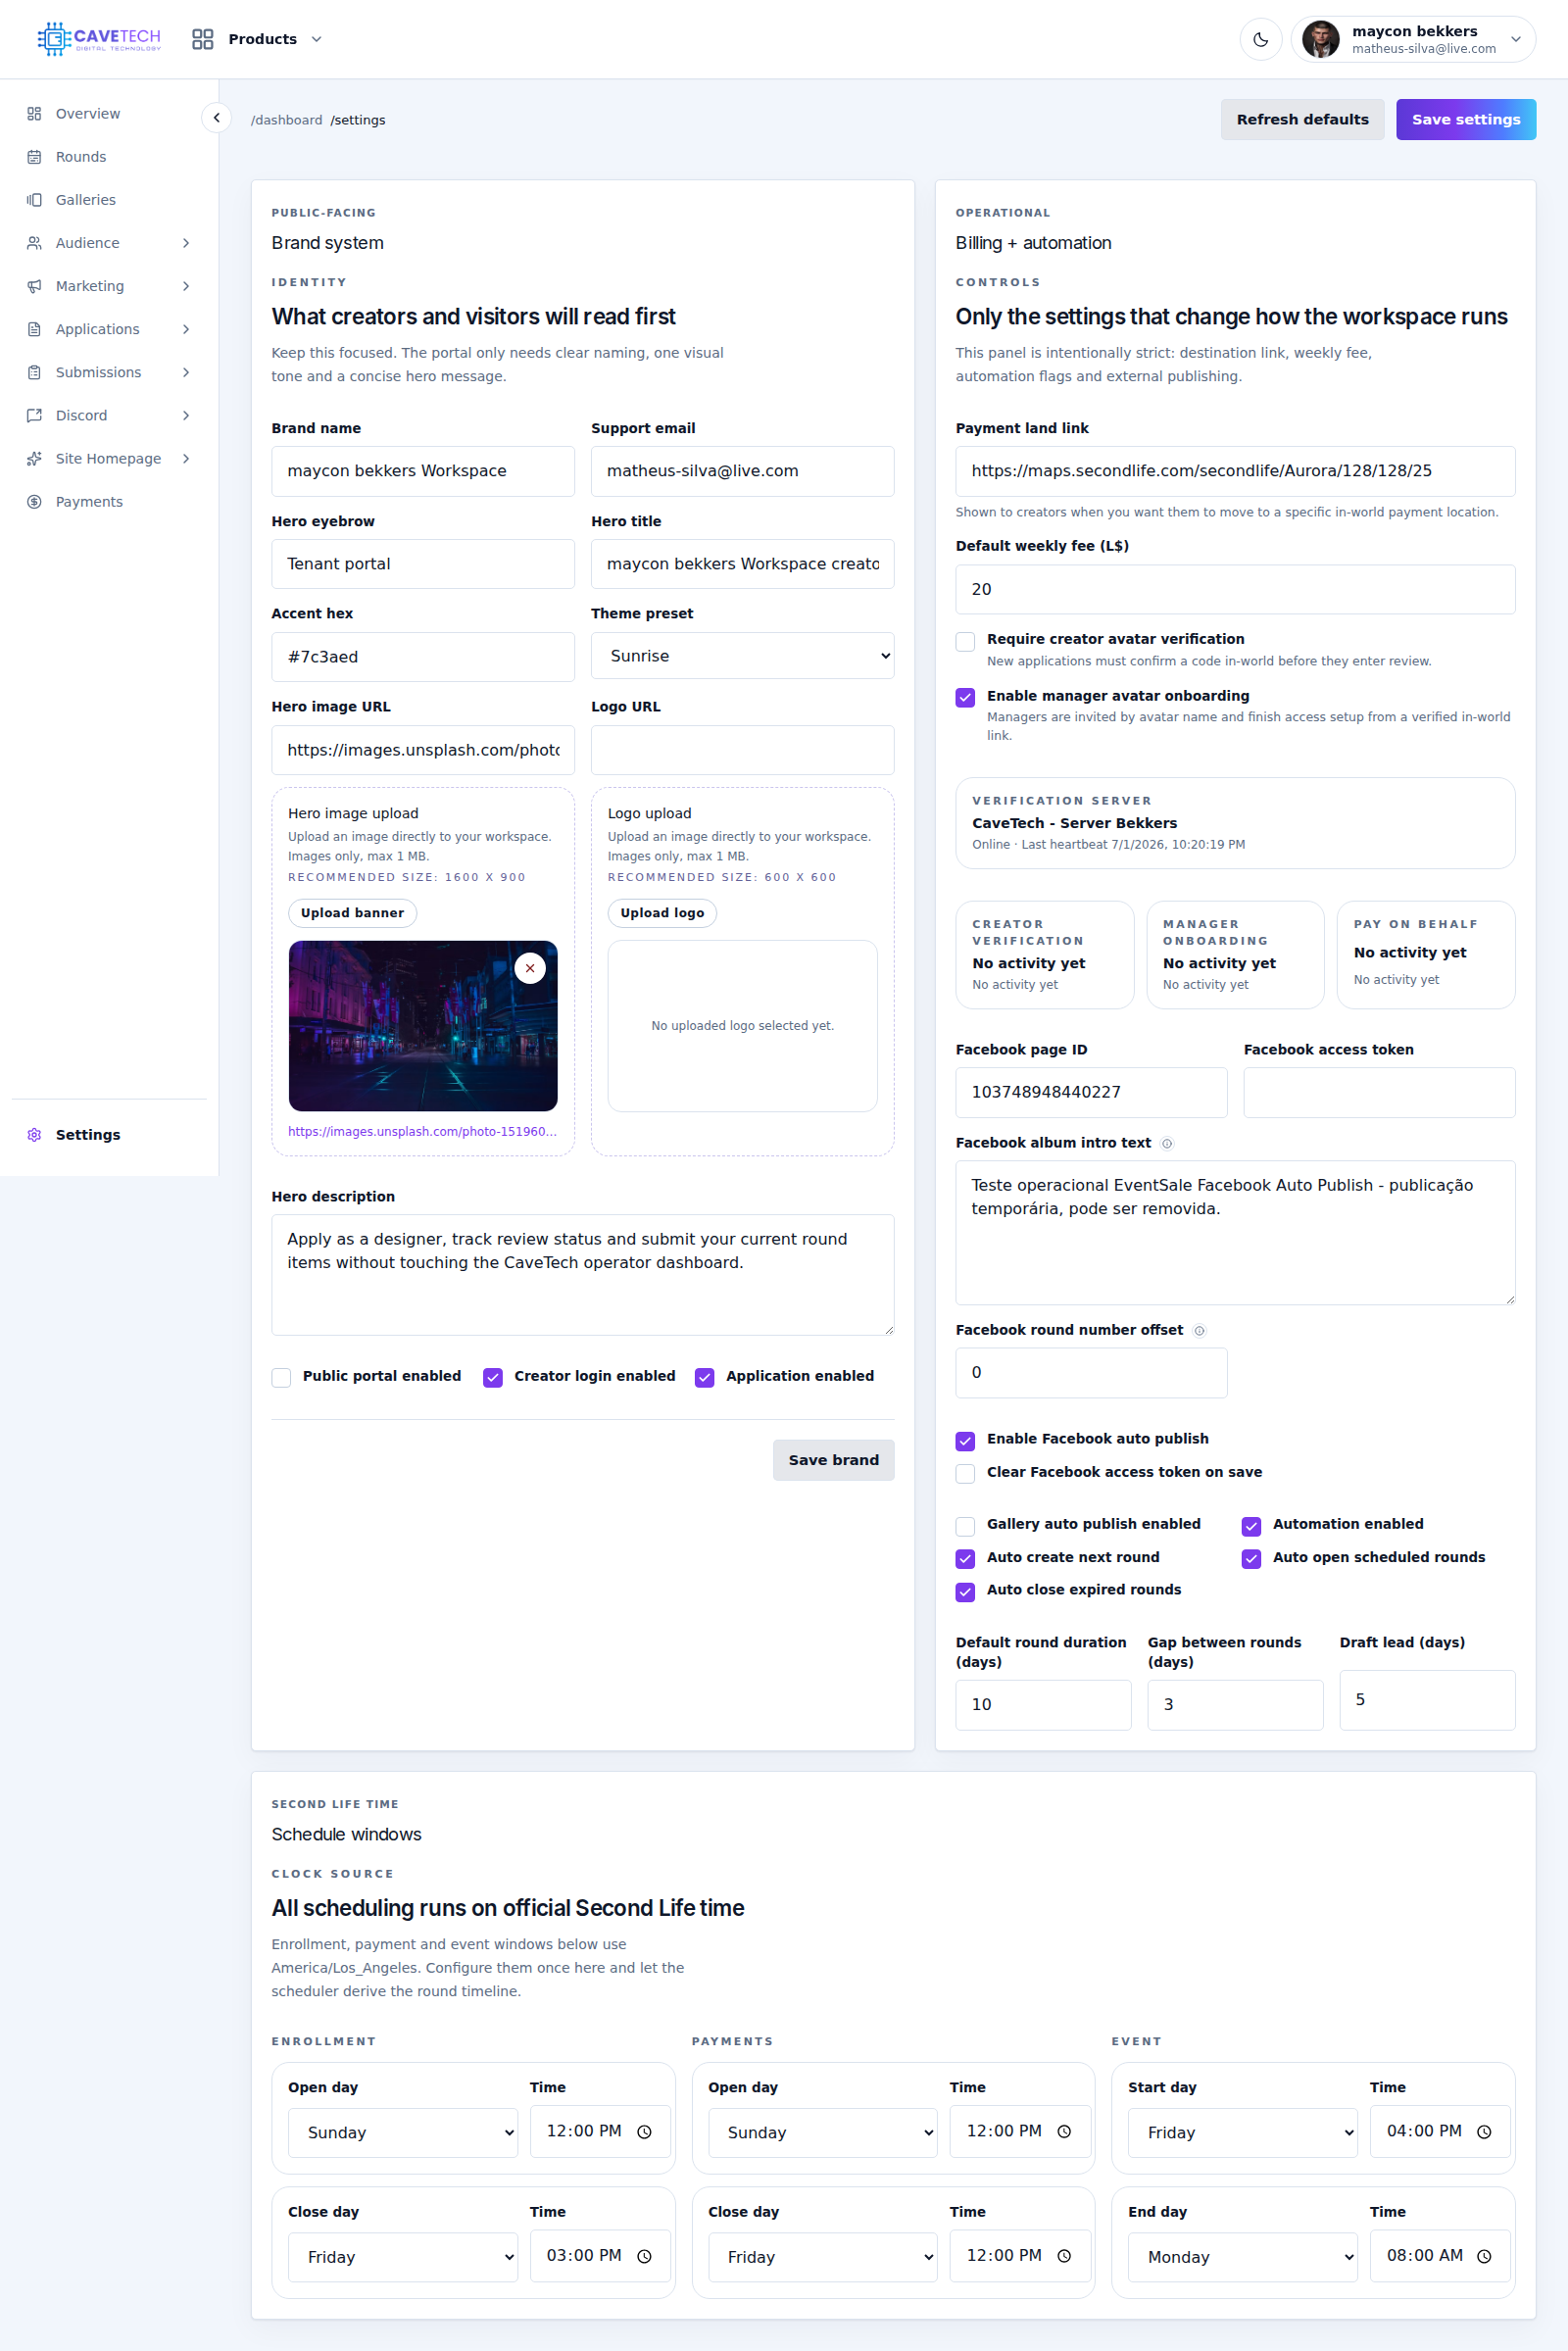
Key options to review before going live:
- Public portal enabled
- Creator login enabled
- Application enabled
- Payment land link
- Default weekly fee
- Require creator avatar verification
- Enable manager avatar onboarding
6. Validate staff access
Open Team and confirm the people operating the workspace have the right roles.
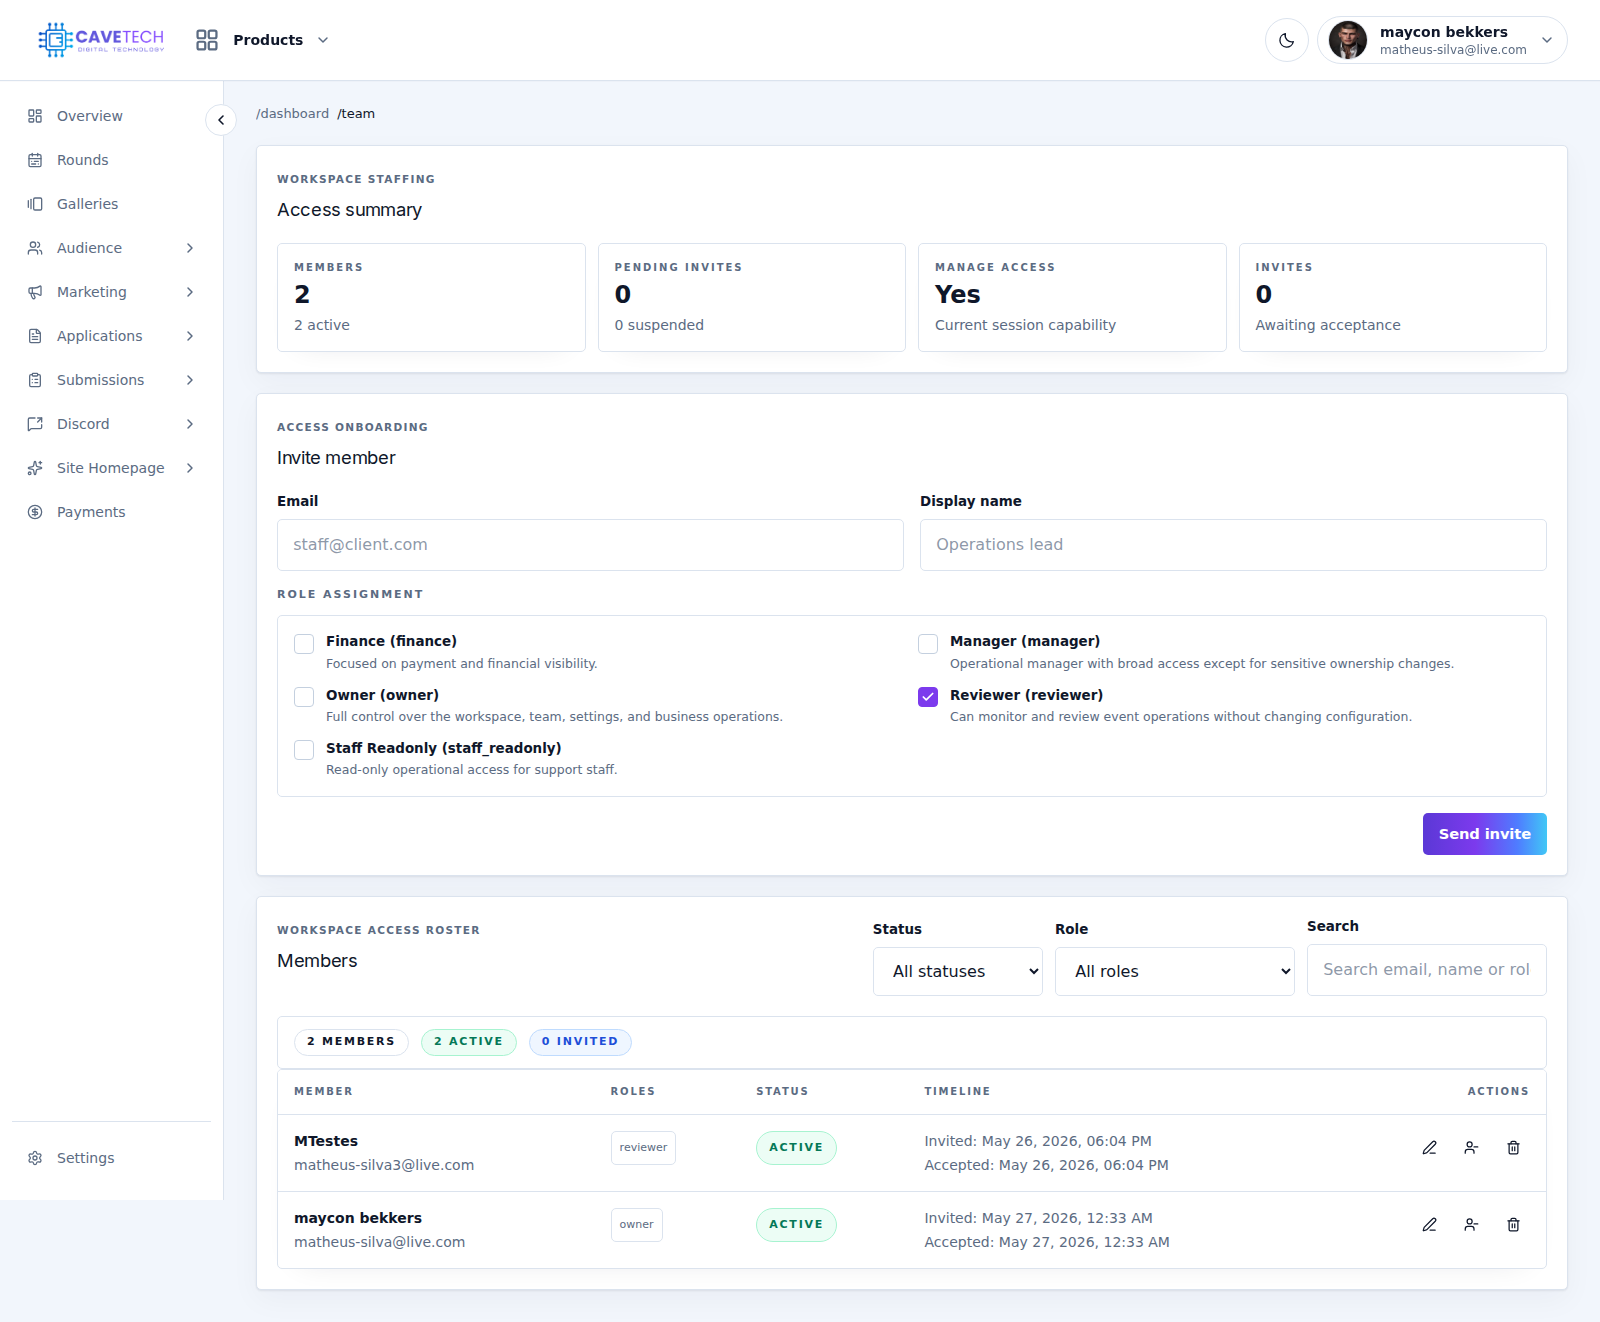
Typical role guidance:
- Owner: full control
- Manager: day-to-day operations
- Reviewer: application and submission review
- Finance: billing and payment visibility
- Staff Readonly: support access without mutation
7. First-launch checklist
Before you tell creators to apply, make sure all items below are true:
- EventSale opens from the central dashboard
- workspace name and branding are correct
- one current round exists
- weekly fee is correct
- payment land link is correct
- creator verification requirement matches your policy
- public homepage is published
- application page opens
- at least one staff owner can review applications
Once that list is green, you can start inviting creators into the workflow.