Create a Product
A Product connects an inventory item or service to its price and selling rules. You can assign the same Product to your Vendor displays without recreating its delivery settings.
Before you start
For a Standard Product, set up a Dropbox and wait for the item and permissions to synchronize. For a credit-only Product, use Store Credit.
Step 1: Open the editor
- Open Products.
- Click Create product.
- Choose Standard Product or Store Credit Product.
The Product type is fixed after creation to preserve financial and delivery history.
Step 2: Select the source and optional Demo
For a Standard Product:
- Under Source, select your Dropbox.
- Under Item, select the inventory entry customers should receive.
- To offer a Demo, select both Demo source and Demo item. Leave both blank if there is no Demo.


The Ready to deliver item label refers to its item configuration and permissions. It does not turn an offline Dropbox into a reachable delivery server.
Step 3: Configure Core settings
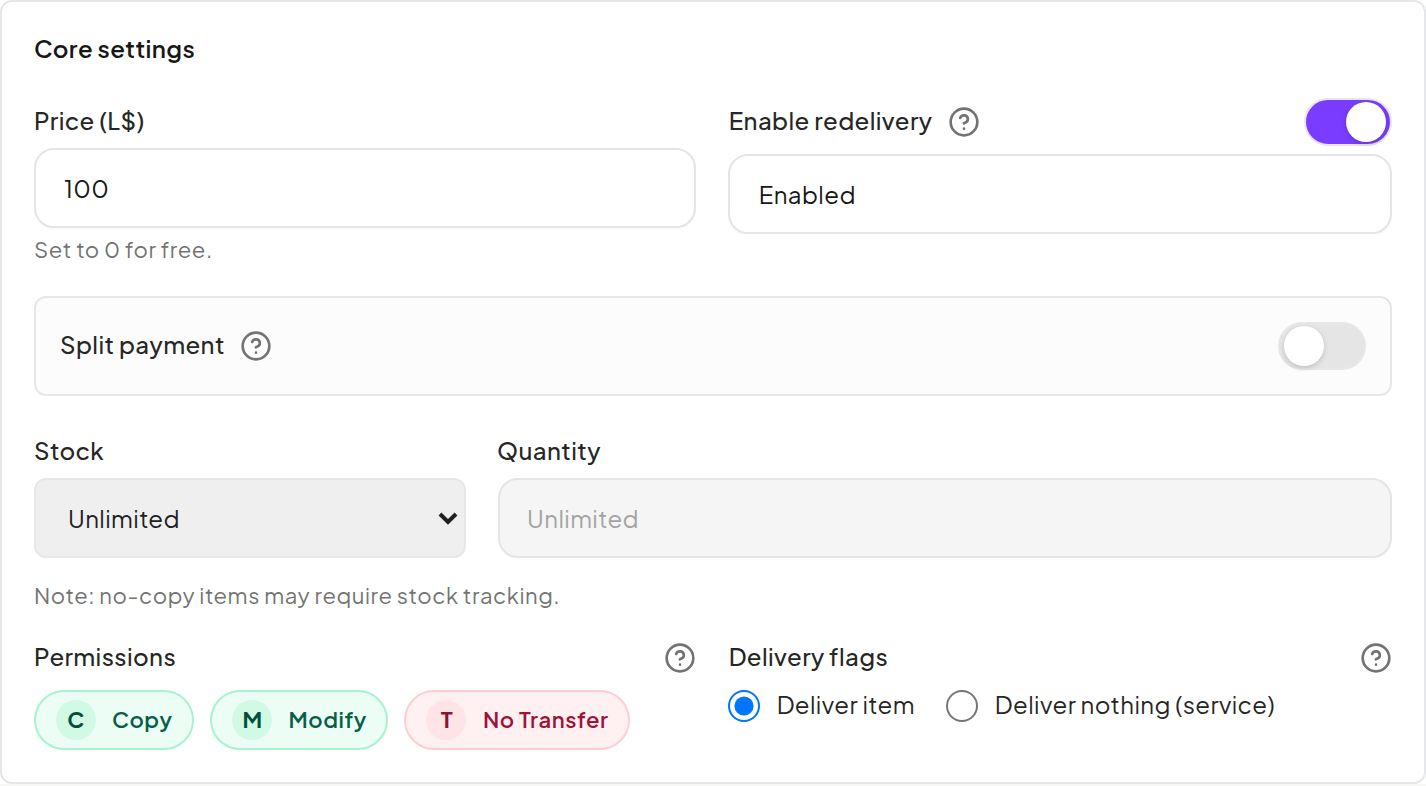
| Field | How to use it |
|---|---|
| Advertising texture UUID | Enable it to supply the Second Life texture used to advertise this Product. |
| Price (L$) | Enter a whole number. Zero creates a free Product; a positive number is the base price. |
| Enable redelivery | Allows eligible customers to recover this Product later. |
| Split payment | Configure optional merchant profit-share recipients. This is separate from CaveTech commission. |
| Stock | Choose Unlimited or Limited. Limited stock needs a non-negative quantity. |
| Permissions | Inspect the synchronized item permissions; these are read-only here. |
| Deliver item | Send the selected inventory item after a successful purchase. |
| Deliver nothing (service) | Record the configured service purchase without sending that item. |
Choose exactly one delivery mode. The displayed next-owner No Transfer permission does not by itself prevent the Dropbox owner from delivering the item; the owner needs their own Transfer permission.
Click Next. If the editor asks you to refresh the Dropbox's permissions, resolve the source problem first.
Step 4: Complete Listing
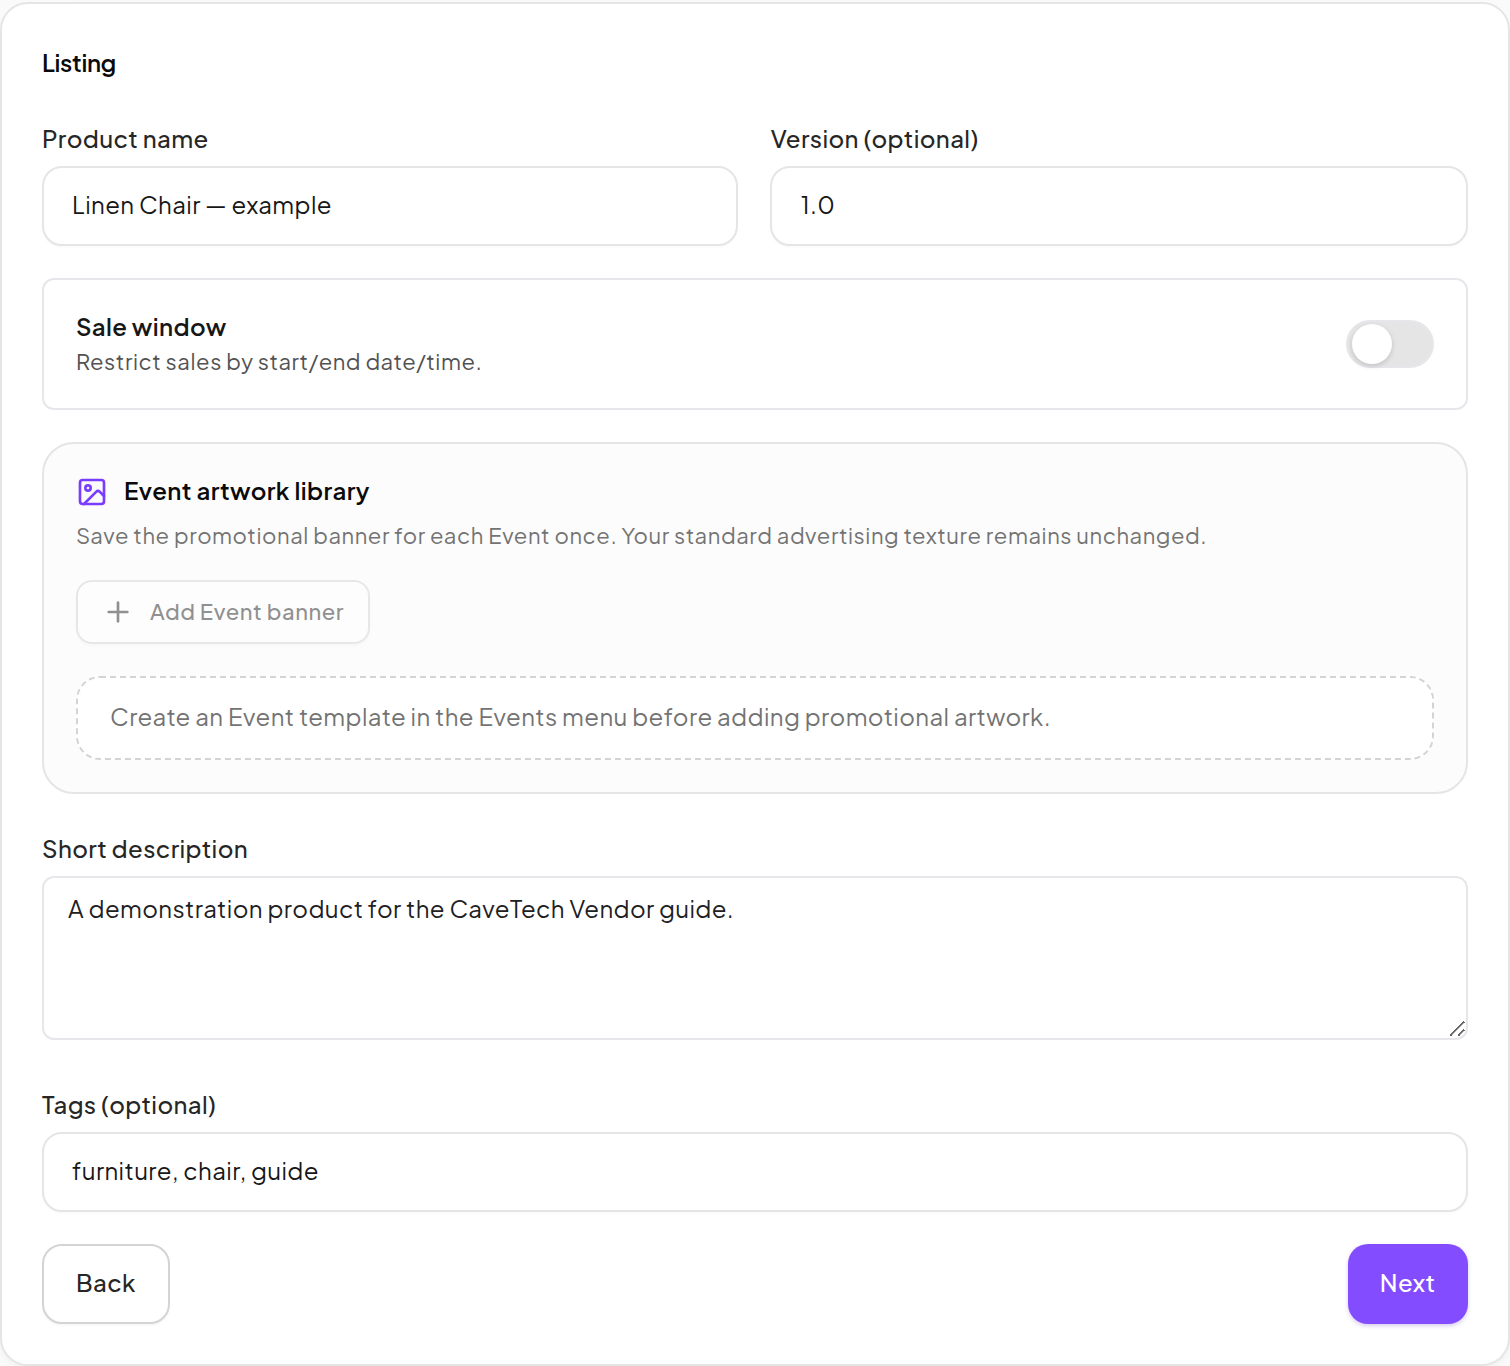
- Enter the Product name customers and reports should use.
- Optionally set Version, Short description and Tags.
- Enable Sale window only if sales should be restricted by a start or end time.
- Add Event-specific banners to the Event artwork library when needed. These do not replace the normal advertising texture.
- Click Next.
Step 5: Review Advanced and save
The Advanced options section starts collapsed. Click Show to configure restrictions, extras or webhook-dependent delivery. See Product options and restrictions before enabling these.
Review the Summary, then click Create product to save the new Product. When editing an existing Product, the final action is Save changes.
Expected result: the Product appears in Products, with the correct price and source. Creating it does not place a physical Vendor in your store or send an item to a customer.
Next: Set up a Vendor object.