Estate Settings
The Estate Settings page allows you to configure all aspects of your virtual real estate business, from branding to property display settings in Second Life.
Overview
The Estate Settings section is where you can customize how your rental business appears to customers and fine-tune the behavior of rental panels in-world. The page is organized into three main tabs:
- Estate Settings - Configure your company's branding, description, and contact information
- Panel Settings - Set up in-world rental panel behavior and appearance
- LandBook Settings - Design your customized web portal for showcasing rental properties
Each tab provides specialized settings that help you create a cohesive brand identity and optimize the customer experience across both the web interface and in-world objects.
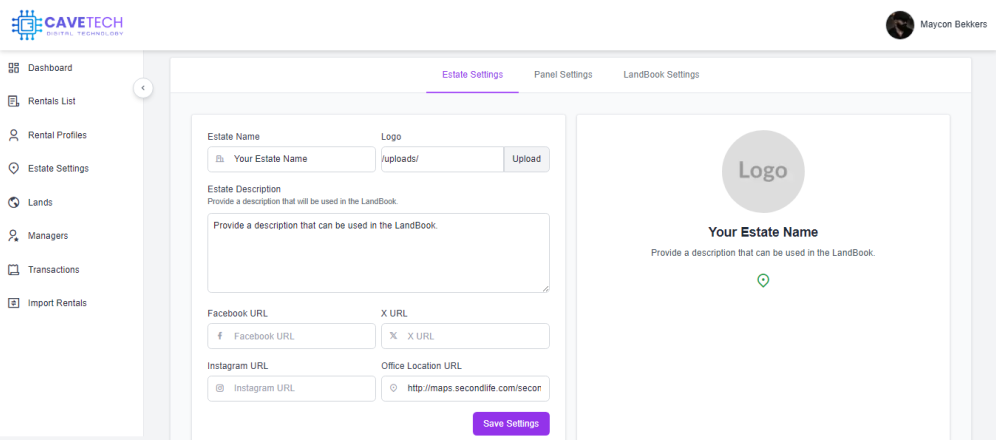
Estate Settings Tab
The Estate Settings tab allows you to define your real estate company's identity and branding. This information is used throughout the system, including the LandBook public website and in-world rental panels.
Company Information
| Setting | Description |
|---|---|
| Estate Name | Your company's name as it will appear in the LandBook and on panels |
| Logo | Your company's logo image (recommended size: 128x128px) |
| Estate Description | A detailed description of your real estate business |
Social Media Integration
Connect your social media accounts to increase your online presence:
- Facebook URL - Link to your company's Facebook page
- X URL - Link to your company's Twitter/X account
- Instagram URL - Link to your company's Instagram profile
Office Location
Provide your in-world office coordinates to allow customers to teleport directly to your main office:
- Office Location - Enter the SLurl or region coordinates
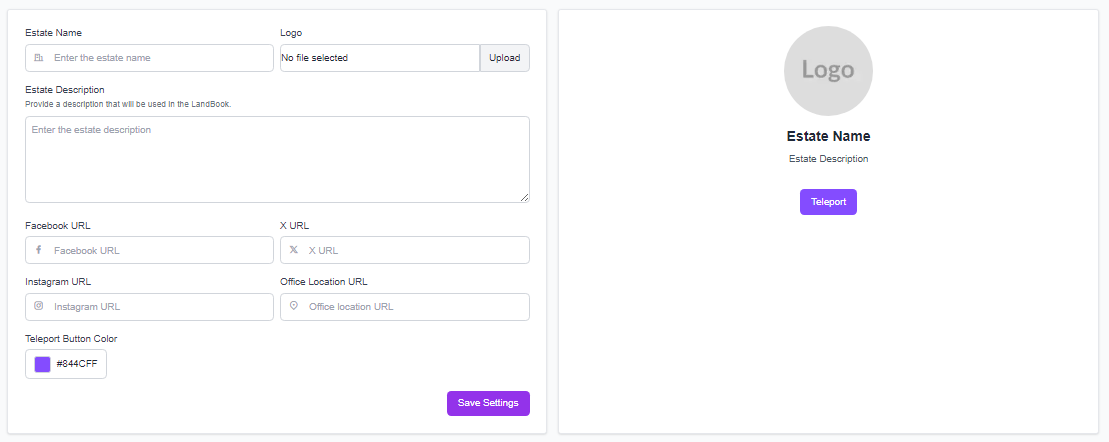
Teleport Button Color
Customize the appearance of teleport buttons throughout the system:
- Color Picker - Select a color that matches your brand identity
Preview Panel
The right side of the screen shows a live preview of how your branding will appear to customers, including:
- Your company logo
- Estate name and description
- Social media links
- Office teleport button
Best Practices
- Consistent Branding: Use the same name and logo across all platforms
- Compelling Description: Write a clear, concise description that highlights your unique selling points
- Valid URLs: Ensure all social media links are correctly formatted and working
- Brand Colors: Choose a teleport button color that matches your overall brand palette
Panel Settings Tab
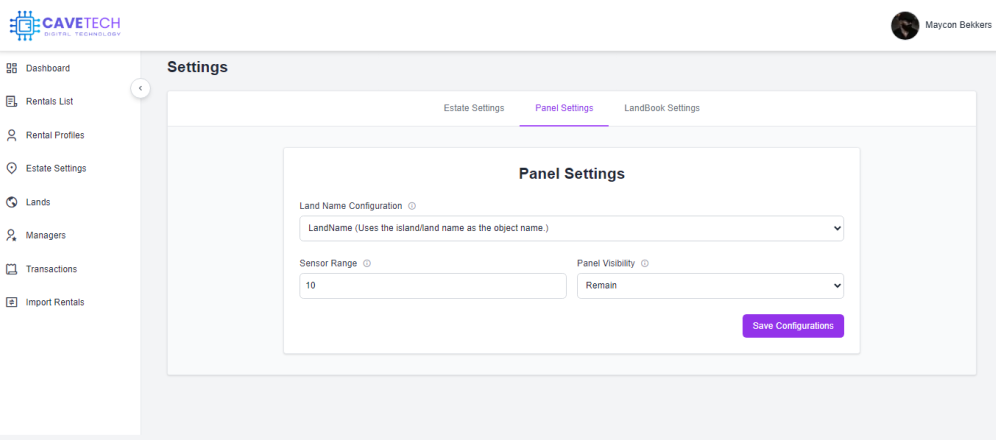
The Panel Settings tab controls how your rental panels behave and appear in-world (in Second Life). These settings affect all panels system-wide.
Land Name Configuration
Choose how your rental parcels are named in-world:
| Option | Description |
|---|---|
| AutoName | Automatically generates names based on parcel size (e.g., "Land_1024_Sqm") |
| LandName | Uses the island/land name as the object name |
| ParcelName | Uses the Second Life parcel name as the object name |
Sensor Range
Configure the detection range for your rental panels:
- Range Value - Set the maximum distance (in meters) that the panel will detect avatars (maximum: 96m)
Panel Visibility
Determine what happens to rental panels when a property is rented:
| Option | Description |
|---|---|
| Disappear | The panel returns to the estate owner's inventory when the property is rented |
| Remain | The panel stays visible even when the property is rented |
Technical Considerations
- Sensor Range: Higher values may cause interference by detecting neighboring properties. A recommended value is 15 meters
- Panel Visibility: Choosing "Disappear" is the best option as it provides tenants with a clean parcel after rental
LandBook Settings Tab
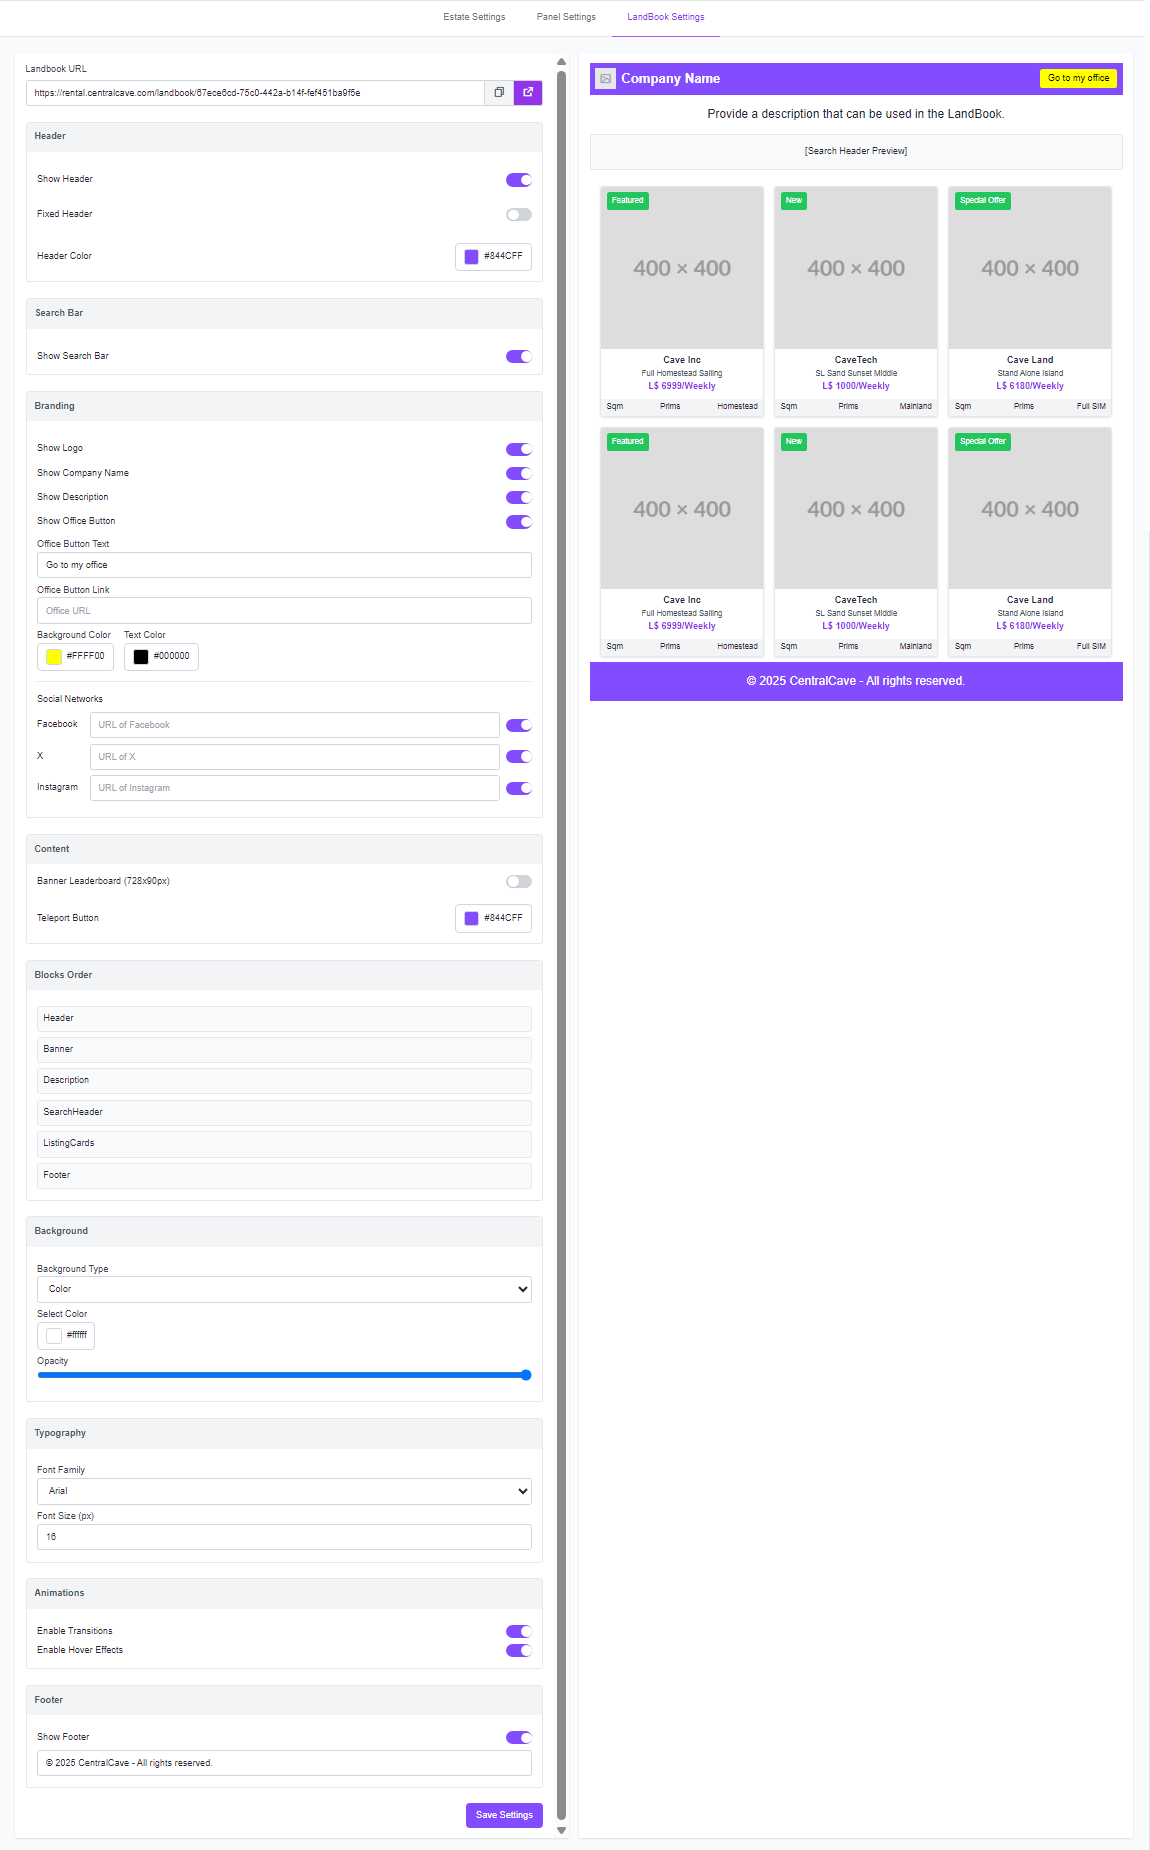
The LandBook Settings tab allows you to customize your public-facing rental property website. This is where potential tenants can browse available properties and learn about your real estate business.
LandBook URL
Your unique LandBook URL is automatically generated based on your account and displayed at the top of this tab. This is the address customers will use to access your rental listings.
Layout Customization
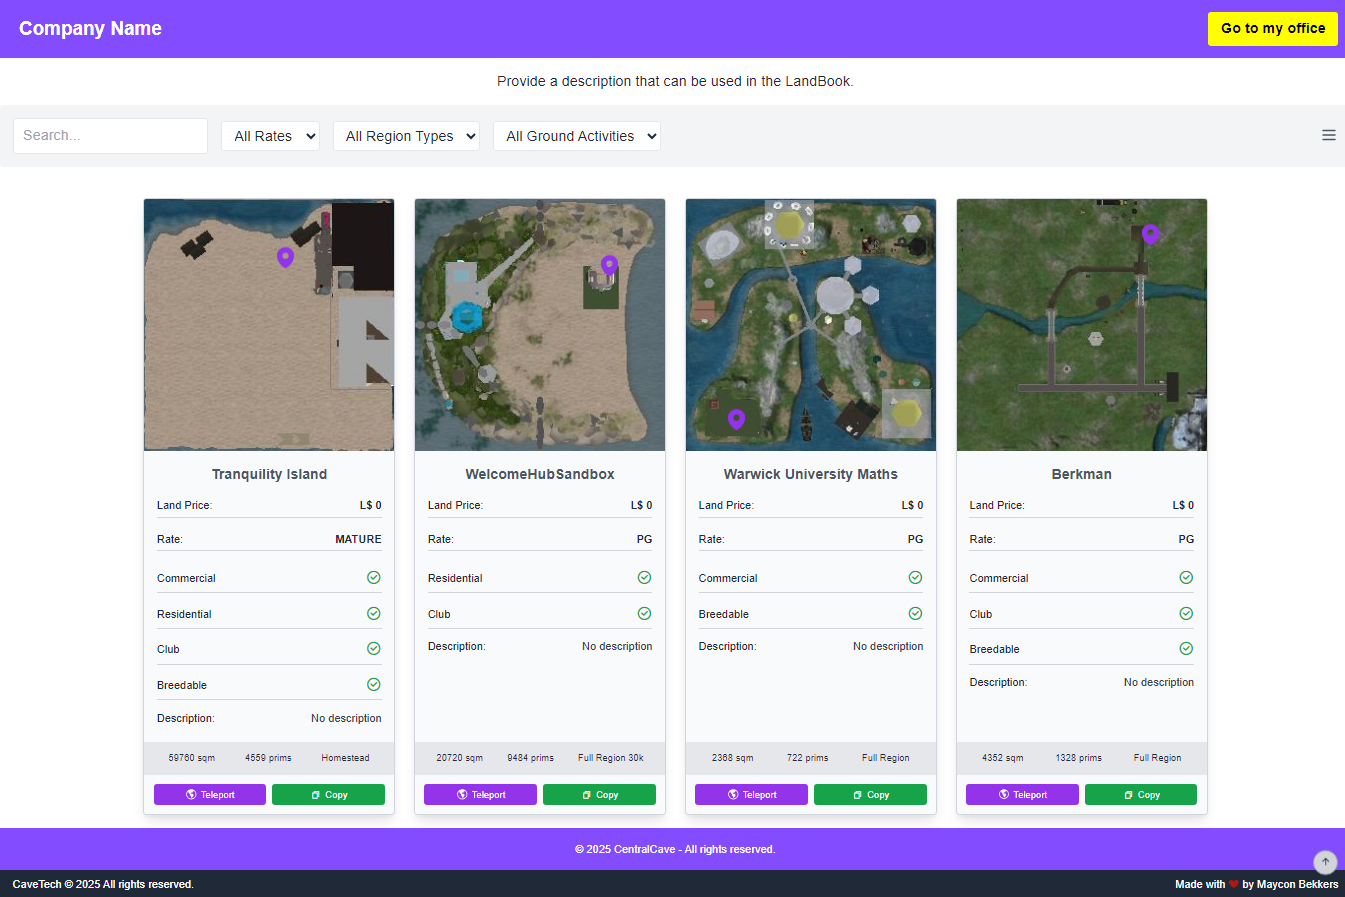
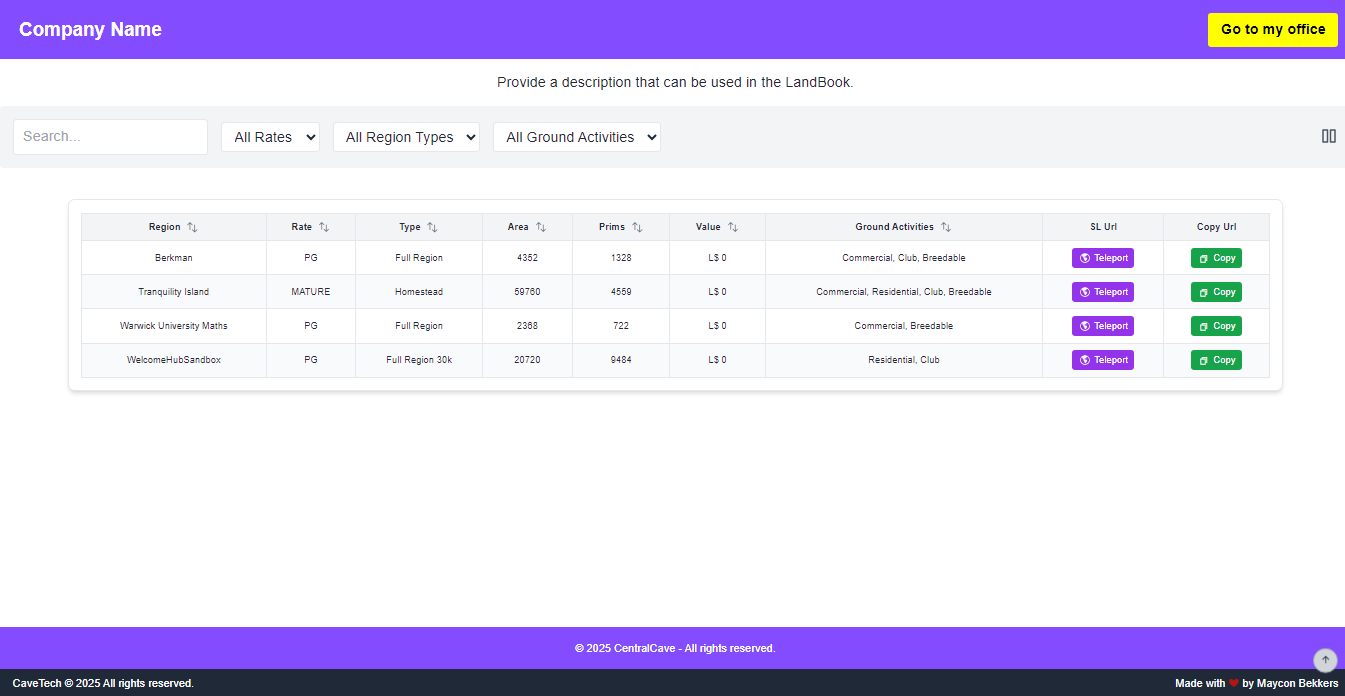
Drag and drop different content blocks to arrange your LandBook page:
| Block | Description |
|---|---|
| Header | Top navigation bar with your logo and company name |
| SearchHeader | Search bar for filtering properties |
| Description | Your company description |
| Banner | Large featured image |
| ListingCards | Grid of rental property listings |
| Footer | Copyright and additional information |
Header Settings
Customize your LandBook header:
- Show Header - Toggle header visibility
- Fixed Header - Keep the header visible while scrolling
- Background Color - Set the header color
- Show Logo - Toggle logo visibility
- Show Company Name - Toggle company name visibility
- Show Social Icons - Choose which social media links to display
Content Settings
Configure the main content area:
- Show Description - Toggle description visibility
- Show Banner - Toggle banner image visibility
- Banner Image - Upload a custom banner image
- Office Button - Configure text, colors, and link for the office teleport button
- Teleport Button Color - Set the color for all teleport buttons
Background Settings
Choose between different background styles:
- Background Type - Select between solid color or image background
- Color - Set the background color (if using color type)
- Image - Upload a background image (if using image type)
- Opacity - Adjust the background opacity
Typography Settings
Customize text appearance:
- Font Family - Choose from available web fonts
- Font Size - Set the base font size
Additional Settings
Fine-tune the user experience:
- Animations - Enable/disable transitions and hover effects
- Footer - Customize footer content
- Accessibility - Toggle high contrast mode and adjust text size
- Search Bar - Toggle search functionality
Live Preview
The right side of the screen shows a live preview of your LandBook layout, updating in real-time as you change settings.
Best Practices
- Consistent Design: Maintain visual consistency with your in-world branding
- Mobile-Friendly: The layout is fully compatible with mobile devices by default
- Focused Content: Prioritize the most important information at the top of the page
- Accessibility: Consider users with different needs when choosing colors and font sizes
Saving Changes
For all tabs, remember to click the "Save" button after making changes. The system will display a confirmation message when your settings are successfully saved.
Troubleshooting
If you encounter issues with the Estate Settings page:
- Image Upload Errors - Ensure images are in a supported format (JPG, PNG) and under 2MB
- Unsaved Changes - Make sure to click the Save button after making modifications
- Preview Issues - If the preview doesn't update, try refreshing the page
- Missing Content - Check that all required fields are filled in correctly
For persistent issues, please contact support.
Next Steps
After configuring your Estate Settings, consider exploring these related sections:
- Rental Profiles - Set up pricing models for your properties
- Rentals List - Manage your rental inventory
- Lands - Configure individual land properties